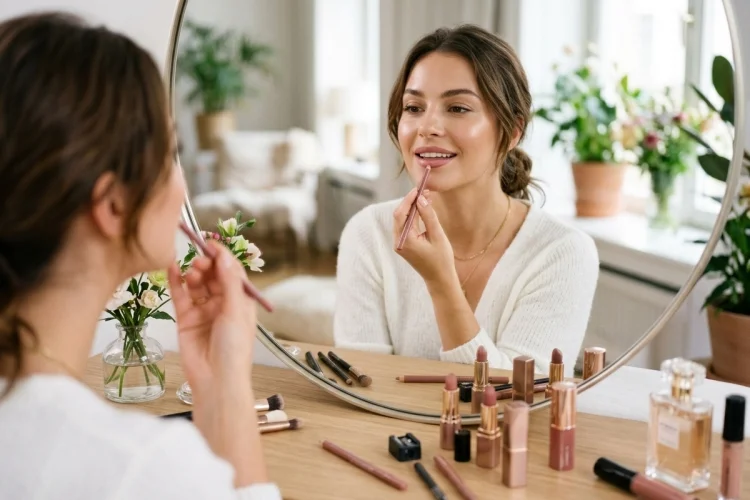
Lip liner can look like an optional extra when you are learning makeup. After all, why add another step when you can simply swipe on lipstick or gloss? Once you learn how to use it properly, though, lip liner can make your entire lip look noticeably cleaner.
A well-applied liner can define your natural lip shape, make uneven edges appear more balanced, create a boundary for lipstick, and help reduce feathering outside the lip line.
It can also add dimension when paired with a slightly lighter lipstick or gloss. L’Oréal Paris notes that liner can provide definition, improve symmetry, and act as a base for longer-lasting lip color.
Learning how to use lip liner for a clean and defined shape does not mean drawing a thick ring around your mouth. The most natural results usually come from gentle lip preparation, short controlled strokes, and subtle blending.
Whether you prefer nude lipstick, glossy lips, or bold red color, these beginner-friendly techniques can make lip liner much easier to master.
1. Prepare Your Lips Before Using Lip Liner
Lip liner works best on a relatively smooth surface.
If your lips are flaky, the pencil may catch on dry skin instead of creating an even line. NYX recommends gently preparing the lips and allowing moisturizing balm to absorb before applying liner.
For mild dryness, gently wipe loose flakes away with a damp washcloth. Avoid aggressive scrubbing, especially if your lips are cracked, sore, or irritated.
Next, apply a comfortable lip balm and let it sit while you complete another part of your makeup.
Before lining your lips, blot away excess balm with a tissue. You want the lips to feel soft but not slippery.
If there is too much balm on the surface, a creamy liner may slide instead of staying exactly where you place it.
2. Choose the Right Lip Liner Shade
Your liner does not always have to match your lipstick perfectly.
For the most natural everyday definition, choose a shade close to your natural lip color or lipstick. This creates a subtle outline without making the border around your mouth look obvious.
For more dimension, try a liner slightly deeper than your lipstick.
L’Oréal Paris recommends choosing a liner around two shades deeper when the goal is subtle lip contouring.
The undertone matters too.
A warm brown liner may pair beautifully with caramel, peach, or terracotta lipstick, while mauve and rosy liners often complement cooler pinks and berries.
When in doubt, choose a neutral liner close to your natural lip tone. It will usually work with more lipsticks and glosses, making it a practical option for a small beginner makeup collection.
3. Start by Mapping Your Cupid’s Bow
The Cupid’s bow is the V-shaped area in the center of the upper lip, and defining it first makes the rest of your lip shape easier to follow.
Start by drawing a small diagonal line from one peak downward toward the center.
Repeat on the opposite side so the two lines form a small X.
Maybelline recommends this X technique as a simple starting point for defining the Cupid’s bow before outlining the rest of the lips. L’Oréal Paris also recommends beginning in the center when working with a defined Cupid’s bow.
Do not make the X large or dramatically pointed.
It should simply follow your natural shape and provide two reference points.
Once it looks reasonably balanced, you can begin connecting those points toward the outer corners.
4. Use Short Strokes Instead of One Long Line
Trying to outline your entire lip with one continuous stroke can make controlling the pencil surprisingly difficult.
Short strokes are easier.
Begin near your Cupid’s bow and gradually work toward one corner. Then return to the center and repeat on the opposite side.
Maybelline recommends using light strokes from the center of the upper lip toward the corners for natural definition.
For the bottom lip, start at the fullest point in the center.
Create a small line there, then gradually connect it outward toward each corner.
Try keeping your hand relaxed.
Pressing too hard can create a thick, dark border that becomes difficult to soften later. Several light strokes usually produce a cleaner result than one heavily drawn line.
5. Follow Your Natural Lip Shape First
Before experimenting with overlining, learn how to trace the lip shape you already have.
Look closely at where the natural color of your lips meets the surrounding skin. Place your liner directly along that boundary.
Do not worry if one side is slightly different from the other.
Almost nobody has perfectly symmetrical lips.
Use the liner to create general visual balance rather than trying to redesign your entire mouth.
For example, if one side of your upper lip is slightly less defined, add a tiny amount of liner there rather than dramatically expanding the entire lip.
L’Oréal Paris describes lip liner as a useful tool for enhancing natural shape and making lips appear more symmetrical.
Once you can consistently follow your natural edges, more advanced lip-shaping techniques become much easier.
6. Overline Only Slightly for a Natural Fuller Effect
Overlining means placing lip liner just outside your natural lip border to create the illusion of fuller lips.
The technique can work beautifully, but subtlety makes an enormous difference.
Instead of outlining your entire mouth several millimeters outside the natural border, concentrate mainly around the fullest areas in the center of your upper and lower lips.
NYX recommends subtle overlining primarily around the center when aiming for natural-looking volume. Maybelline similarly suggests beginning around the Cupid’s bow and center of the lower lip when creating an overlined effect.
Gradually reconnect the liner with your natural lip line as you approach the corners.
Keeping the corners close to their original shape usually makes the illusion more believable.
Check your overlining from a normal distance. If you can immediately see where your real lip ends, you may have extended the liner too far.
7. Blend the Lip Liner Inward
A crisp outer line can provide definition, but you usually do not want an obvious ring around your lips.
After outlining, soften the inner edge.
You can use a clean fingertip and lightly tap the pigment inward. Maybelline recommends gently blending the inner edge when pairing liner with another lip product.
Do not completely erase the outline.
You simply want a gradual transition between the liner and the center of your lips.
NYX also recommends blending liner inward when you want a softer or ombré effect instead of an extremely sharp border.
This technique is particularly useful when your liner is darker than your lipstick.
A blended border gives you dimension. An unblended dark line with very pale lipstick can create a much stronger, more graphic effect.
Both styles can work—the important thing is choosing intentionally.
8. Fill in Your Lips for Longer-Lasting Color
Lip liner does not have to stop at the border.
After creating your outline, lightly shade the rest of your lips with the same pencil.
L’Oréal Paris notes that lip liner can be used as an all-over base before lipstick. NYX also recommends filling in the entire lip when you want additional longevity from the liner.
Use the side of the pencil rather than the sharp tip when filling a larger area.
This distributes pigment more quickly and reduces unnecessary pressure.
Then apply lipstick or gloss over the top.
If your lipstick wears away while eating or drinking, the liner underneath may leave behind some color instead of exposing completely bare lips.
You can even skip lipstick and wear liner across the entire lip with a little gloss or balm for a simple monochromatic look.
9. Use Lip Liner to Help Reduce Feathering
Bold lipstick can sometimes move into the tiny lines surrounding the mouth, creating a blurred edge known as feathering or bleeding.
Lip liner can help create a boundary around your lipstick.
L’Oréal Paris specifically describes preventing bleeding and feathering as one of lip liner’s useful functions.
Trace your natural outline carefully before applying lipstick.
For particularly creamy lip products, you can also lightly shade slightly inward from the border rather than drawing only a thin external line.
This creates a wider base for the lipstick to grip.
Do not assume liner will make every lipstick completely transfer-proof, however. Eating, drinking, oils, and the formula itself can still affect wear.
Think of lip liner as helping your lipstick behave more predictably rather than permanently locking it into place.
10. Keep Your Lip Liner Tip Precise
Precision becomes much harder when your lip pencil has a wide, rounded tip.
If you use a traditional wooden pencil, sharpen it regularly with a cosmetic sharpener. A reasonably precise point makes outlining areas such as the Cupid’s bow much easier.
Maybelline specifically recommends maintaining a precise tip when using sharpenable lip liner.
You do not need the pencil to be painfully sharp.
You simply want enough definition to control where the pigment goes.
Retractable liners may not require sharpening, but always check the packaging because some twist-up-looking pencils are actually designed to be sharpened.
For broader shading across the lips, turn the pencil slightly sideways.
Use the narrow point for detailed work and the wider side for filling larger areas.
11. Correct Uneven Liner Before Adding Lipstick
Always inspect your liner before covering it with lipstick.
Relax your mouth and look straight into the mirror.
Check the Cupid’s bow, outer corners, and center of your lower lip.
If one small section looks uneven, remove a little product with a clean cotton swab rather than automatically expanding the other side.
For bolder lipstick looks, concealer around the outside of the lips can also create a sharper edge. L’Oréal Paris recommends a small amount of concealer for correcting or refining highly precise lip looks.
Do not spend too long chasing mathematical symmetry.
Real lips have natural differences, and tiny variations are usually invisible from normal conversational distance.
Once the overall outline appears clean and balanced, add your lipstick, gloss, or lip oil and enjoy the result.
Learning how to use lip liner for a clean and defined shape becomes much easier when you treat it as a guide rather than simply drawing a dark border around your mouth.
Begin with smooth, comfortable lips, define your Cupid’s bow, and work from the center outward using short, light strokes.
Follow your natural lip shape until you feel comfortable with the technique. If you want fuller-looking lips, overline only slightly and concentrate the effect around the center rather than dramatically extending every edge.
Blend your liner inward before applying lipstick, or fill the entire lip when you want a stronger base for longer-lasting color.
Try practicing with a neutral liner close to your natural lip tone first. Once clean outlining becomes easy, experiment with deeper shades, subtle overlining, gloss combinations, and ombré lip looks.