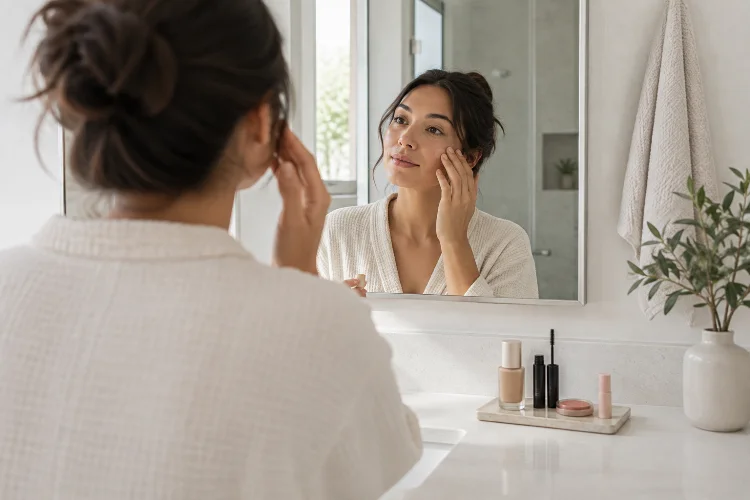
Starting a makeup routine can feel strangely complicated.
Walk into a beauty store or scroll through social media, and you might see dozens of products being used for a single look: primers, correctors, foundations, powders, bronzers, contour sticks, multiple eyeshadows, setting sprays, and tools you have never seen before.
Thankfully, your everyday routine does not need all of that.
Learning how to build a simple makeup routine from scratch at home is mostly about choosing a few useful products, understanding the order in which to apply them, and practicing until the process feels comfortable.
You do not need professional skills or a huge cosmetics collection. In fact, starting with fewer products often makes learning easier because you can see what each item actually does.
Whether you want something for work, college, casual outings, or simply experimenting in front of the mirror, the following steps will help you create a beginner makeup routine that is practical, flexible, and easy to repeat.
1. Decide What You Want From Your Makeup Routine
Before buying anything, think about what you actually want makeup to do for you.
Maybe you only want to even out your complexion and look slightly more polished. Perhaps you want your brows and lashes to appear more defined. Or maybe your goal is eventually learning colorful eyeshadow and more creative looks.
Knowing your goal prevents you from buying products simply because they are trending.
For a simple everyday routine, you probably do not need contour palettes, false eyelashes, multiple primers, or twelve eyeshadow shades. A lightweight base, concealer, brow product, mascara, blush, and lip color can already create a complete look.
Think of your first makeup collection as a starter kit rather than the final version. You can always expand it later.
2. Build a Small Beginner Makeup Kit
A basic routine becomes much easier when you keep your product list manageable.
Start with products that perform clear functions. A beginner kit might include moisturizer, sunscreen, skin tint or foundation, concealer, eyebrow pencil or gel, mascara, blush, and a lip product.
You may also want translucent powder if your skin becomes oily throughout the day.
Primer, bronzer, highlighter, eyeliner, eyeshadow, and setting spray are useful for some people, but none of them needs to be part of your first routine.
When choosing cosmetics, consider your skin type as well. Someone with oily skin may prefer lighter or more matte formulas, while dry skin may look more comfortable with hydrating or luminous products.
If you tend to develop acne, the American Academy of Dermatology recommends looking for terms such as “oil-free,” “won’t clog pores,” or “non-comedogenic” when selecting makeup and skincare products.
There is also no rule saying every product has to come from the same brand. Mixing affordable and premium cosmetics is perfectly normal.
3. Prepare Your Skin Before Makeup
Makeup tends to look better when the skin underneath is comfortable and properly prepared.
Start with clean skin. If necessary, gently wash your face with a cleanser that works for your skin type, then apply moisturizer. Avoid aggressively scrubbing the skin because irritation can make foundation more difficult to apply evenly.
During the daytime, sunscreen should come before makeup. Mayo Clinic recommends broad-spectrum sunscreen with an SPF of at least 30 as part of sun protection.
Allow your skincare products to settle for a few minutes before moving to makeup.
If you are introducing a completely new skincare or cosmetic product and have reactive skin, testing it on a small area first can also be useful.
The American Academy of Dermatology recommends testing new products before adding them fully to your routine, especially when irritation is a concern.
Primer can come next, but consider it optional. Your moisturizer may already provide a comfortable enough base.
4. Create an Easy, Natural-Looking Base
Foundation does not need to completely hide your skin.
For beginners, a skin tint, BB-style product, or light-to-medium coverage foundation can be easier to control than a very full-coverage formula.
Start with a small amount around the center of the face, where redness and uneven tone are often more noticeable. Blend outward using clean fingers, a damp sponge, or a foundation brush.
The biggest beginner lesson here is simple: use less than you think you need.
You can always add another thin layer. Removing thick, cakey foundation is much harder.
Next, apply concealer only where it is useful, such as beneath the eyes, around the nose, or over an obvious blemish. Blend the edges rather than covering large areas automatically.
If your forehead, nose, or chin becomes shiny, add a light layer of powder. Dry skin may need very little powder – or none at all.
A simple base should still look like your skin, just slightly more even.
5. Shape Your Brows Without Overcomplicating Them
Brows often look intimidating because online tutorials can involve several products and highly detailed shaping.
Your beginner routine can be much simpler.
Brush your brow hairs upward and outward, then look for areas where the brows appear slightly sparse. Fill those spaces using short, light strokes with a pencil or brow powder.
Try not to draw one thick line across the entire eyebrow. Natural brows contain variations in density, so leaving some skin visible can create a softer result.
Clear or tinted brow gel is another beginner-friendly option. It can keep hairs in place without requiring much precision.
And remember that eyebrows are sisters, not photocopies. Trying to make them perfectly identical can sometimes result in applying more product than necessary.
It may take a little practise before you discover the amount and shape that suit your face.
6. Keep Eye Makeup Simple at First
You do not need a complicated smoky eye to make your eyes look more defined.
Mascara alone can make a significant visual difference. Curl your lashes if you like, then apply one or two thin coats of mascara from the roots toward the tips.
If you want to experiment with eyeshadow, begin with one neutral shade across your eyelid. A second, slightly deeper color can eventually be blended into the crease when you feel more confident.
Eyeliner is also optional. Beginners often find a soft pencil easier to control than highly pigmented liquid liner.
Eye products deserve extra attention when it comes to hygiene. The FDA recommends washing your hands before applying eye cosmetics, keeping applicators clean, avoiding shared products, and discarding eye cosmetics associated with an infection.
Never add water or saliva to dried mascara to make it usable again. That can introduce contamination into the product.
Good hygiene might not be as exciting as perfect eyeliner, but it is definately part of a good beauty routine.
7. Bring Color Back With Blush
Once foundation has evened out your complexion, your face may look slightly flatter than usual. Blush brings some natural-looking color back.
Start with a very small amount and blend it across the cheeks. Cream formulas can be blended with fingers or a sponge, while powder blush usually works well with a fluffy brush.
Where you place blush can slightly change the overall effect. Applying it mainly to the apples of the cheeks creates a classic fresh look, while blending it a little higher toward the temples can create a more lifted appearance.
Do not worry about following one strict placement rule. Face shapes vary, so experiment at home and see what looks balanced on you.
Bronzer and highlighter can eventually be added after blush, but they are not necessary for creating a finished everyday face.
8. Finish With an Easy Lip Product
Your lip product can be as simple or as dramatic as you want.
For the easiest everyday option, try lip balm, tinted balm, gloss, or sheer lipstick. These products generally require less precision and can be reapplied quickly throughout the day.
If you eventually want stronger colors, lip liner can help create a cleaner outline before lipstick.
Choosing your first shade does not have to involve complicated color theory. A color relatively close to your natural lip tone is often an easy starting point.
From there, experiment.
Maybe you discover that warm peach tones look great on you, or perhaps cooler berry shades feel more flattering. Makeup involves some trial and error, and that is part of the fun.
9. Take Care of Your Makeup and Tools
A good home makeup routine includes cleaning, storage, and product replacement – not just application.
Wash brushes regularly. The American Academy of Dermatology recommends cleaning makeup brushes every seven to ten days because brushes can collect product residue, dirt, oil, and microorganisms.
Sponges should also be cleaned frequently and allowed to dry completely.
Avoid sharing makeup, particularly products used around the eyes and lips. Keep containers closed, store cosmetics away from extreme heat, and pay attention to unusual changes.
Makeup that suddenly smells different, changes color, develops a strange texture, or no longer performs normally may need to be replaced.
Finally, remove your makeup before sleeping. The AAD recommends removing makeup, including eye makeup, and gently cleansing the face rather than scrubbing aggressively.
It only takes a few minutes, and making this part of your routne from the beginning is much easier than trying to build the habit later.
Learning how to build a simple makeup routine from scratch at home does not require twenty products or professional-level skills.
Start with skin preparation, create a light base, define your brows and lashes, add a little blush, and finish with a comfortable lip product.
The goal is not to master every makeup technique immediately. It is to create a routine you can repeat confidently and gradually improve.
Practice when you are not rushing to go anywhere. Try different amounts of foundation, experiment with blush placement, and see which products actually make a difference for you.
Once your basic routine feels natural, you can chooose whether to add eyeliner, eyeshadow, bronzer, highlighter, or other techniques. Build slowly, enjoy the process, and let your makeup collection grow with your skills – not faster than them.