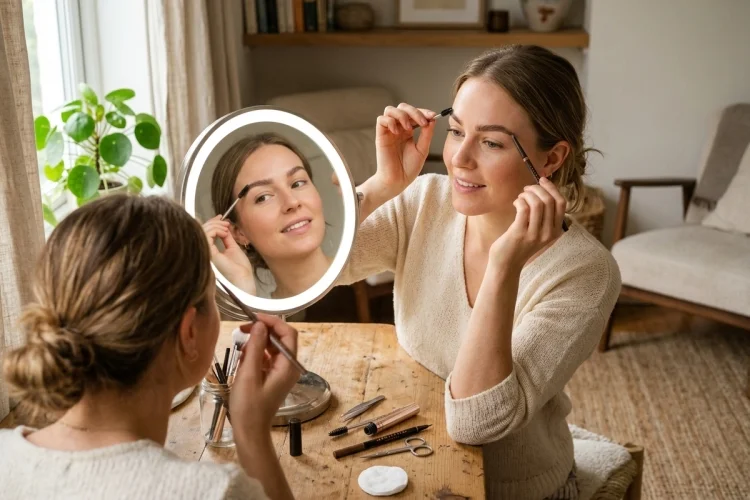
Eyebrows may only take up a small part of your face, but they can make a surprisingly big difference to your overall appearance.
A little grooming can frame your eyes, create better balance between your features, and make your everyday makeup look more polished.
The challenge starts when shaping turns into over-shaping. Tweeze too many hairs, create an arch that is too sharp, or fill your brows with a heavy block of color, and the result can quickly look less natural than you intended.
Learning how to shape your eyebrows for a natural appearance is mostly about working with the brows you already have rather than trying to completely redesign them.
Modern brow techniques generally focus on identifying your natural starting point, arch, and tail, then cleaning up stray hairs and filling only the areas that need extra definition.
You do not need perfect symmetry or professional brow skills. With a spoolie, tweezers, small scissors, and a suitable brow product, you can create soft, balanced eyebrows at home.
1. Start by Studying Your Natural Brow Shape
Before reaching for tweezers, take a good look at your eyebrows exactly as they are.
Brows naturally vary in thickness, arch height, length, and hair direction. One person may have naturally straight eyebrows, while another has a noticeable arch. Trying to force both into exactly the same shape usually creates unnecessary work.
Use a clean spoolie to brush your eyebrow hairs upward and slightly outward. This helps reveal the actual outline of each brow and makes sparse areas easier to identify.
L’Oréal Paris recommends brushing the hairs upward before trimming because doing so makes overly long hairs easier to see and reduces the chance of accidentally removing too much.
Step back from your mirror afterward.
Instead of focusing on individual hairs, look at how the brows balance your entire face. Natural-looking brows do not need to be perfectly identical-they simply need to look related.
2. Use Simple Brow Mapping to Find Your Shape
Brow mapping sounds complicated, but beginners can use a very simple version at home.
Take a slim makeup brush or eyebrow pencil and hold it vertically beside your nose. Where the tool reaches your brow provides a useful reference for where the eyebrow can begin.
Next, angle the pencil so it passes from the side of your nose toward the outer part of your iris. This gives you a reference for the highest area of the arch.
Finally, angle the pencil from your nostril toward the outer corner of your eye. The point where it reaches the brow can guide the approximate end of the tail.
Maybelline recommends a similar three-point method when identifying the beginning, arch, and endpoint of an eyebrow.
These points are guides, not strict mathematical rules.
If your natural brow sits slightly differently, do not automatically remove large amounts of hair to fit the map. Use mapping mainly to understand your proportions.
3. Trim Long Brow Hairs Carefully
Trimming can instantly make unruly eyebrows look tidier without changing their basic shape.
First, brush the eyebrow hairs upward using your spoolie.
You may notice several hairs extending noticeably beyond the natural upper edge of your brow. Using small eyebrow scissors, trim only the excess length.
L’Oréal Paris recommends trimming hairs that are clearly longer than the others rather than cutting every brow hair to exactly the same height.
This distinction matters.
Cutting too aggressively can create gaps when you brush your brows back into their normal position.
Work slowly and trim one or two hairs at a time. Every few cuts, brush your brows back into place and check the result from a normal distance.
Natural eyebrow grooming is usually more about restraint than precision.
4. Tweeze Only the Hairs That Clearly Look Out of Place
Tweezers can help refine your brows, but they are also one of the easiest tools to overuse.
Start with obvious stray hairs between the brows and underneath the natural brow line.
Avoid immediately removing hairs from the upper edge simply because they do not appear perfectly uniform. Those hairs may contribute to the natural fullness of your eyebrows.
L’Oréal Paris advises using tweezers mainly to clean up stray hairs rather than trying to create an entirely new brow shape.
A useful technique is to tweeze a few hairs and then step away from the magnifying mirror.
Look at your face normally.
If the brow already looks cleaner, stop. You can always remove another hair later, but an accidentally over-tweezed area may take considerably longer to grow back.
When in doubt, leave the hair alone.
5. Pick the Right Brow Product for Your Needs
Not every eyebrow requires a pencil, powder, pomade, pen, and gel.
Your natural hair density should guide your product choice.
If your brows are already thick but tend to move around, a clear or tinted brow gel may be enough. L’Oréal Paris notes that clear gel can be especially useful for fuller brows when the main goal is simply keeping hairs in position.
If you have several sparse areas, a fine eyebrow pencil or brow pen can help imitate missing hairs.
Powders can create softer shading, while pomades usually provide stronger definition and may require a little more control.
For beginners who want natural eyebrow makeup, a slim pencil paired with a spoolie is one of the simplest combinations.
You can create individual strokes and then soften them immediately if they become too noticeable.
6. Use Short, Hair-Like Strokes When Filling Your Brows
The biggest difference between natural and heavily drawn eyebrows often comes down to technique.
Avoid coloring the entire brow as though you were filling in a shape on paper.
Instead, identify actual gaps between your brow hairs.
Use a fine pencil or pen to create short, light strokes that follow the direction of natural hair growth. Maybelline specifically recommends light, short strokes to imitate individual eyebrow hairs.
At the front of your brows, your strokes may point more upward.
As you move through the arch, angle them slightly outward. Near the tail, the hairs usually follow a more horizontal or downward direction.
Pressure matters too.
Pressing hard creates darker, thicker lines that are more difficult to blend. A light hand gives you room to gradually build definition.
7. Keep the Front of Your Brows Softer
One common eyebrow makeup mistake is making the inner section as dark as the tail.
Natural brows usually have some variation in density and color.
Maybelline recommends concentrating more definition around the middle and outer areas while keeping the front lighter. It also suggests using lighter and darker tones to reproduce the natural variation found in eyebrow hair.
Try beginning your filling around the arch or middle of the brow.
Use whatever product remains on your pencil, brush, or spoolie to lightly define the front.
You can also create a subtle gradient: softer at the inner brow and gradually more defined toward the arch and tail.
This tiny adjustment can make a heavily filled eyebrow look considerably more natural.
8. Blend With a Spoolie More Than You Think
If there is one eyebrow tool worth owning, it may be the spoolie.
After filling your brows, brush through them upward and outward.
This distributes pigment between the natural hairs and softens obvious pencil marks. Maybelline specifically recommends repeated spoolie blending as a way to create more natural-looking eyebrows.
If one section looks too dark, do not immediately erase everything.
Brush through it several times first.
You may find that the excess pigment spreads enough to create exactly the softness you wanted.
L’Oréal Paris similarly recommends brushing through finished brows to blur harsh lines and help the makeup blend with natural eyebrow hair.
Finish by directing the hairs into the position you prefer.
9. Set the Hairs With Brow Gel
Once you like the shape, brow gel can help keep everything in place.
Clear gel is useful when you already have sufficient natural color. Tinted gel can add a little extra fullness and definition at the same time.
Brush the front hairs slightly upward for a fluffy appearance, then gradually move outward as you approach the tail.
Both Maybelline and L’Oréal Paris recommend brow gel as a finishing step after filling and shaping.
Do not automatically flatten every hair into exactly the same direction.
Some variation creates a softer, more believable result.
If you prefer a very natural everyday look, brow gel alone may even replace pencils and powders on days when your eyebrows do not need additional filling.
10. Avoid Chasing Perfect Symmetry
Your eyebrows are sisters, not photocopies.
One brow may naturally sit slightly higher, have a stronger arch, or grow more densely than the other. Attempting to make them mathematically identical can lead to endless filling and tweezing.
Use your makeup to create general balance instead.
For example, you can add two or three pencil strokes to a sparse arch instead of redrawing the entire eyebrow.
A standard mirror is particularly helpful because it lets you evaluate both brows together. L’Oréal Paris recommends alternating between close-up and regular mirrors during shaping to reduce the risk of over-tweezing or over-filling.
Remember that people normally see your entire face, not one eyebrow under magnification.
A small difference that seems obvious five centimeters from the mirror may be practically invisible from normal distance.
Learning how to shape your eyebrows for a natural appearance is mainly about enhancing what is already there. Start by brushing your brows into place, identify their natural beginning, arch, and tail, and trim only hairs that are noticeably too long.
When tweezing, concentrate on obvious stray hairs rather than dramatically changing your natural brow shape. Fill sparse areas using short, feather-like strokes, keep the front softer than the tail, and blend everything thoroughly with a spoolie.
Most importantly, do not chase perfect symmetry or remove too much hair in one session. Natural brows have texture, different hair directions, and small variations.
During your next brow routine, try making fewer changes than usual. Brush first, remove only obvious strays, add pencil only where you can see genuine gaps, and finish with gel. Your most flattering brow shape may already be much closer than you think.