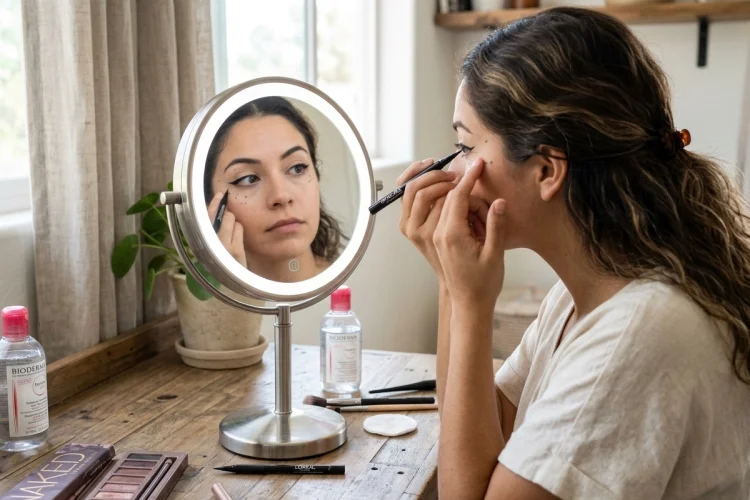
Eyeliner has a funny way of making one eye look perfect while the other seems determined to do something completely different.
You draw a neat little wing on the first side, move to the second eye, and suddenly one wing is higher, longer, thicker, or pointing in another direction.
If that sounds familiar, you are definitely dealing with one of the most common challenges in eye makeup.
Learning how to apply eyeliner evenly and neatly on both eyes is less about having perfectly steady hands and more about using a repeatable technique.
Small guide marks, short strokes, proper mirror position, and frequent comparison between both eyes can make eyeliner much easier to control.
The type of eyeliner you use matters too. Pencil formulas tend to be forgiving, while liquid liners can create sharper lines but usually require more practice.
With a little patience, you can stop treating your second eye like an emergency repair project and start creating balanced eyeliner much more consistently.
1. Choose an Eyeliner You Can Control Easily
Before worrying about symmetry, choose a formula that matches your current skill level.
Pencil eyeliner is usually one of the easiest options for beginners because it provides control and can be softly blended when the line is not perfect.
Gel gives you more precision while still allowing some working time, while liquid eyeliner is excellent for crisp lines and sharp wings but can be less forgiving.
If you are still learning, there is nothing wrong with starting with pencil.
You can even create your basic shape with pencil first and trace over it with liquid liner once both sides look balanced. Maybelline recommends this kind of mapping approach when trying to make winged eyeliner more even.
For everyday makeup, brown eyeliner can also look softer than intense black, especially when you want definition without a dramatic finish.
The easiest eyeliner is the one that gives you enough control to correct mistakes before they become bigger.
2. Sit Down and Stabilize Your Hand
A shaky hand becomes even shakier when you are standing awkwardly in front of a mirror.
Whenever possible, sit at a table or vanity and place your elbow on a stable surface.
This gives your hand additional support.
You can also gently rest part of your hand against your cheek while drawing the line. Just avoid pulling the eyelid too tightly, because the shape may look different once the skin returns to its normal position.
Position your mirror slightly below eye level so you can look downward while still seeing your lash line.
For wings, periodically look straight ahead.
This matters because eyeliner that looks symmetrical with your eyes partially closed may appear completely different once both eyes are open.
If you have hooded eyes, checking the liner while looking straight forward becomes especially useful because part of the eyelid may disappear into the crease when your eyes are open.
3. Start With Small Guide Points on Both Eyes
Trying to draw an entire eyeliner shape in one perfect stroke puts unnecessary pressure on you.
Instead, map both eyes first.
Place several tiny dots or short dashes along your upper lash line. Keep them close to the lashes and make approximately the same marks on each eye.
L’Oréal Paris recommends using small strokes or dots across the lash line and then connecting them when applying liquid eyeliner.
This technique makes symmetry much easier because you are comparing small sections rather than finished lines.
Do not complete your entire right eye before beginning your left.
Work alternately.
Make one guide mark on the right eye, then create the matching mark on the left. Continue switching sides as you build the shape.
Think of eyeliner as drawing two matching outlines gradually rather than finishing one masterpiece and then attempting to copy it from memory.
4. Keep Your Eyeliner Thin at First
Another common mistake is starting with a thick line.
Once eyeliner becomes too thick, making both eyes match usually means making the thinner side increasingly thicker. Five minutes later, your subtle everyday eyeliner has turned into an accidental dramatic look.
Start as thin as possible.
Place the eyeliner directly along the upper lash line, keeping the product close enough that there is no obvious gap between your lashes and the liner.
L’Oréal Paris recommends creating a thin line first and gradually increasing the thickness only if you want a bolder result.
This gives you room to correct uneven sections.
If one side looks slightly thinner, you can add another small stroke.
It is much easier to add eyeliner than remove half of a thick line without disturbing your eyeshadow or foundation.
For a simple everyday makeup look, the thinnest version may actually be all you need.
5. Use Short Strokes Instead of One Long Line
You may see experienced makeup artists create eyeliner in one smooth motion, but beginners do not need to copy that technique.
Use several short, controlled strokes.
Begin around the middle or outer section of your lash line and slowly connect the marks. You can then work toward the inner corner using increasingly thinner strokes.
L’Oréal Paris recommends connecting short, steady strokes instead of immediately attempting one continuous line.
Keep your movements small.
A long stroke increases the chance that your hand will change direction halfway through the line.
Short sections also let you stop and compare both eyes frequently.
After every few strokes, lower your hands and look straight into the mirror.
Ask yourself whether the lines have similar thickness, placement, and direction.
Correcting a tiny difference now is much easier than fixing it after adding wings.
6. Map Both Wings Before Filling Them In
Winged eyeliner is where symmetry becomes especially challenging.
Instead of fully completing one wing first, create only the outer guideline on each eye.
One useful reference is the direction of your lower lash line. Maybelline recommends following this natural angle outward to help create a consistent wing direction on both eyes.
Start at the outer corner and create a short line angled slightly upward.
Then stop.
Do the exact same thing on the other eye.
Look straight ahead and compare them.
Are they pointing in similar directions? Are they approximately the same length?
Only after the two guide lines look balanced should you connect each wing back toward the upper lash line.
This simple habit prevents one of the biggest eyeliner problems: creating a beautiful wing on one eye before discovering that copying its angle on the second eye is unexpectedly difficult.
7. Use Your Natural Eye Shape as the Guide
Perfect eyeliner does not mean forcing both eyes into a completely identical geometric shape.
Human faces are naturally asymmetrical.
One eye may sit slightly higher, have a different crease, or open a little wider than the other. Trying to draw mathematically identical lines can sometimes make those differences more noticeable.
Instead, aim for visual balance.
If you have hooded eyes, for example, the wing may need to be positioned differently so it remains visible when you look forward. L’Oréal Paris recommends creating the wing while the eyes are open and looking straight ahead when working with hooded lids.
Similarly, Maybelline recommends considering natural eye contours rather than using exactly the same wing formula for everyone.
Your goal is not two perfectly measured drawings.
You want both eyes to look balanced when someone sees your whole face.
8. Correct Mistakes Without Making the Line Thicker
Here is a classic eyeliner trap.
One eye looks slightly uneven, so you add more eyeliner.
Then the other side looks too thin, so you add more there.
Ten corrections later, both lines are twice as thick as originally planned.
Instead of always correcting mistakes by adding product, learn to remove small areas.
L’Oréal Paris recommends using a cotton swab with a small amount of micellar water to clean up uneven eyeliner or sharpen the edge of a line.
A pointed cotton swab can be particularly useful around wings.
Remove only the area that needs correction and allow the skin to dry before reapplying eyeliner.
For extremely small mistakes, you may also be able to soften the edge using a tiny amount of concealer on a precise brush.
The important rule is simple: sometimes making eyeliner even requires subtraction, not addition.
9. Check Both Eyes From a Normal Distance
Magnifying mirrors are useful for precision, but they can also make tiny differences seem much more dramatic than they actually are.
Every few minutes, move back from your mirror.
Look straight ahead with a relaxed expression.
Your eyeliner should appear similar in thickness and direction when viewed as part of your complete face.
Do not obsess over a one-millimeter difference that nobody will notice during normal conversation.
Also remember that your eyes themselves are not perfectly identical, so eyeliner may never look completely symmetrical in an extreme close-up.
A practical goal is balanced, not mathematically perfect.
This mindset also prevents endless corrections that eventually turn a clean eyeliner look into something much heavier than you wanted.
10. Practice Eyeliner Before You Actually Need It
Eyeliner is a motor skill.
Reading tutorials helps, but your hands learn through repetition.
L’Oréal Paris specifically recommends practicing liquid eyeliner regularly rather than waiting until an important event to try perfecting the technique.
Try practicing before removing your makeup at night.
Draw two small wings, compare them, erase them, and try again.
There is no pressure because you are about to wash your face anyway.
You can also practice with a pencil before progressing to liquid liner.
After several sessions, you will begin learning how much pressure your eyeliner requires, how quickly it dries, and what wing angle naturally suits your eyes.
Consistency eventually becomes much easier because your hand starts remembering the movement.
11. Keep Eyeliner Application Safe and Hygienic
Because eyeliner is applied close to your eyes, hygiene should be part of your technique.
The FDA recommends washing your hands before applying eye cosmetics and keeping any tools used around the eyes clean. Eye makeup should not be shared with other people because this can transfer microorganisms.
Never apply eyeliner while riding in a moving vehicle.
The FDA warns that sudden movement can cause an applicator to scratch the eye or surrounding sensitive tissue.
Only use products intended for the eye area as eyeliner. The FDA specifically advises against substituting products such as lip liner because their ingredients or color additives may not be approved for use around the eyes.
If an eye cosmetic causes irritation, stop using it.
Good eyeliner should enhance your eyes, not make them uncomfortable.
Learning how to apply eyeliner evenly and neatly on both eyes becomes much easier when you stop trying to complete each eye in one perfect motion.
Stabilize your hand, start with thin guide marks, use short strokes, and alternate between both eyes as you build the shape.
For wings, map the direction and length on both sides before filling anything in. Check your eyeliner while looking straight ahead, and remember that visual balance matters more than perfect mathematical symmetry.
If something goes wrong, clean up the line instead of automatically making everything thicker.
Most importantly, practice when there is no pressure to get it right. Spend a few minutes experimenting before removing your makeup at night.
With repetition, your hand control improves, your preferred wing angle becomes familiar, and matching both eyes starts feeling much less difficult.