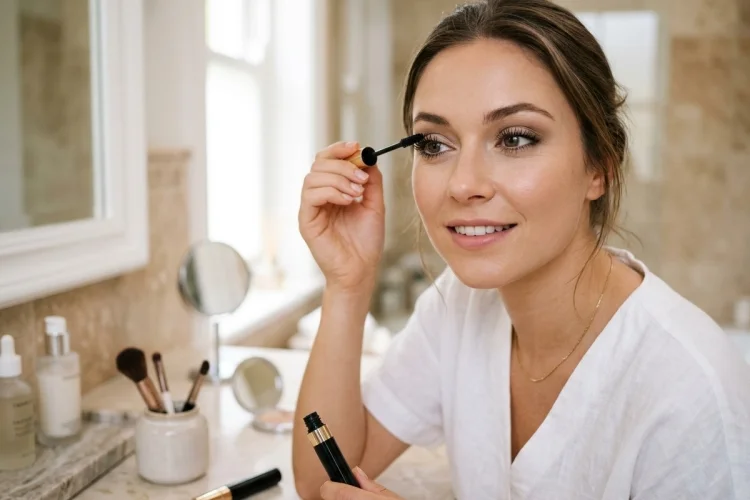
Mascara sounds like one of the easiest makeup products to use. Pull out the wand, swipe it through your lashes, and you are done-right?
Unfortunately, the reality can include lashes sticking together, black dots on your eyelids, smudges under your eyes, and clumps that somehow get worse every time you try to fix them.
The good news is that smooth mascara application does not require professional makeup skills. Most problems come down to using too much product, applying several heavy coats, working with dirty lashes, or choosing a technique that does not suit your mascara wand.
Learning how to apply mascara without any clumps or smudges is mainly about controlling the amount of formula on the brush and building definition gradually.
Starting at the roots and sweeping toward the tips is also a standard application technique recommended by major mascara brands.
With a few simple adjustments, you can create separated, defined lashes without turning your morning makeup routine into a cleanup project.
1. Always Start With Clean, Dry Lashes
A clean base matters just as much for mascara as it does for foundation.
If yesterday’s mascara, eye cream, makeup remover, or oily skincare is still sitting on your lashes, fresh mascara may struggle to apply evenly. Old product can also contribute to a thicker, clumpier appearance.
L’Oréal Paris recommends beginning mascara application with clean lashes because leftover mascara can encourage lashes to stick together and form clumps.
If you recently applied eye cream, give it enough time to absorb before starting your eye makeup.
You do not need to aggressively cleanse or rub your lashes. Simply make sure there is no obvious makeup residue or excessive oil.
If you like using an eyelash curler, use it before applying mascara. Curl gently rather than repeatedly squeezing the lashes as hard as possible.
Starting with separated, dry lashes gives your mascara a much better chance of looking smooth.
2. Choose a Mascara Wand That Matches Your Goal
Mascara brushes are not all designed the same way.
Some have large, fluffy bristles designed to create volume. Others use narrow or flexible brushes that can reach smaller lashes and provide greater separation.
Maybelline notes that different wand shapes can produce different effects. Curved brushes may emphasize lift, thinner flexible brushes can reach smaller lashes, while larger fluffy brushes tend to focus more on volume.
For beginners who frequently struggle with clumping, a smaller or well-defined brush may be easier to control than a huge volumizing wand loaded with product.
Your formula matters too.
A lightweight, buildable mascara gives you more freedom to apply several thin layers. Waterproof formulas can be useful when moisture or humidity regularly causes smudging, although they generally require more careful removal.
Choose mascara based on the problem you actually want to solve rather than simply buying whichever product promises the most dramatic lashes.
3. Remove Excess Product From the Wand
One of the simplest tricks for clump-free mascara happens before the wand reaches your lashes.
When you remove the brush from the tube, check how much formula is sitting on it.
If there is a large blob of mascara around the tip or heavy buildup between the bristles, gently remove the excess against the opening of the tube.
L’Oréal Paris recommends scraping excess product from the wand before application to help mascara spread more smoothly and evenly.
You do not need to repeatedly wipe the entire brush clean.
The idea is simply to prevent one overloaded section of the wand from depositing a thick lump onto your eyelashes.
Also avoid repeatedly pumping the wand rapidly in and out of the tube. This can push additional air into the container and contribute to the formula drying out faster.
A controlled amount of mascara is much easier to work with than an overloaded brush.
4. Apply Mascara From the Roots to the Tips
Now comes the main application technique.
Position the mascara wand close to the base of your upper eyelashes without touching your eye.
Gently wiggle the brush from side to side at the roots, then sweep it upward toward the tips.
L’Oréal Paris recommends this root-to-tip motion, using a light wiggle at the base before moving upward. Maybelline similarly recommends extending mascara from the roots toward the ends of the lashes.
The small wiggle helps distribute product around the base while separating lashes.
As you move upward, reduce the pressure.
You generally want more concentration near the roots and a lighter coating toward the tips. Applying too much mascara to the ends can make lashes appear heavy and more likely to stick together.
For inner lashes, adjust the angle of the brush carefully rather than forcing the entire wand into the corner of your eye.
5. Build Volume With Thin Layers
If you want fuller lashes, resist the temptation to apply one extremely thick coat.
Thin layers provide much more control.
Apply your first coat evenly and inspect the lashes. If you want additional volume or length, add another light layer instead of immediately loading the brush with a large amount of formula.
L’Oréal Paris identifies excessive mascara as a common cause of clumping and recommends building coverage gradually.
How long you should wait between layers can depend on the formula. Some mascaras are specifically designed to be layered before the previous coat fully dries, while other formulas work better after a brief setting period.
Maybelline, for example, advises not allowing certain buildable mascaras to dry completely between coats.
For this reason, check the instructions for your specific mascara.
As a general beginner rule, two controlled coats usually look cleaner than repeatedly layering until your lashes become stiff and overloaded.
6. Use a Clean Spoolie to Separate Clumps
Even careful mascara application sometimes produces a clump.
Do not panic and immediately add another coat.
Instead, take a clean, dry spoolie or lash comb and gently run it through the affected lashes while the mascara is still workable.
L’Oréal Paris recommends a clean spoolie for separating lashes and removing excess mascara when clumping occurs.
Work from near the roots toward the tips.
Do not aggressively pull through resistance. The goal is to separate hairs, not scrape all the mascara away.
This technique is particularly useful when two or three lashes have stuck together but the rest of your mascara looks good.
Keeping a spare clean spoolie in your makeup kit can save you from completely removing and reapplying your eye makeup.
7. Apply Less Mascara to Your Lower Lashes
Lower-lash mascara is where smudging often begins.
Because lower lashes are shorter and closer to the skin, a heavily loaded mascara brush can easily leave black marks underneath your eyes.
Use whatever small amount of product remains on your wand rather than dipping back into the tube for a fresh layer.
You can also hold the brush vertically and use the tip to lightly coat individual lower lashes. L’Oréal Paris recommends a lighter approach on the lower lashes, while Maybelline’s mascara guidance also emphasizes controlled root-to-tip application.
One coat is usually enough for an everyday makeup look.
If your lower-lash mascara consistently transfers underneath your eyes, you can simply skip it.
Another option is using a long-wearing or waterproof formula specifically on the lower lashes while keeping your normal mascara on top.
8. Let Mascara Smudges Dry Before Removing Them
Getting mascara on your eyelid is annoying, but immediately rubbing the spot often makes things worse.
Wet mascara spreads easily.
Instead, finish the rest of your lashes and give the accidental mark time to dry.
Once dry, gently remove it with a clean cotton swab. Small dried spots often lift away much more easily than wet ones.
For stubborn marks, use a tiny amount of suitable makeup remover on a cotton swab and clean only the affected area.
L’Oréal Paris recommends cotton swabs and micellar water as a targeted way to clean mascara smudges without unnecessarily removing the surrounding makeup.
This technique is especially helpful when you have already spent time blending eyeshadow.
The rule is simple: do not turn one tiny mascara dot into a large gray smear by attacking it immediately.
9. Prevent Mascara From Smudging During the Day
If your mascara looks perfect in the morning but leaves dark marks underneath your eyes by lunchtime, consider what might be causing the transfer.
Oily skin around the eyes can contribute to makeup movement. Very rich eye products can also create a slippery surface.
Allow skincare to absorb before applying mascara and avoid placing heavy creams directly against the lash line immediately before makeup.
You can lightly set the surrounding under-eye area if necessary, but do not use excessive powder simply to protect your mascara.
Your mascara formula also matters.
If humidity, sweat, or watery eyes are frequent problems, a waterproof, water-resistant, or smudge-resistant formula may perform better for you.
Maybelline notes that mascara formulas vary considerably depending on whether the desired result is volume, length, waterproof wear, or other needs.
Sometimes persistent smudging is not an application problem at all-it is simply a sign that another formula may suit your routine better.
10. Replace Old or Dried-Out Mascara
Sometimes clumpy mascara is not caused by your technique.
The product may simply be old.
As mascara ages, its consistency can change and become drier or thicker, making smooth application increasingly difficult.
The U.S. Food and Drug Administration notes that eye-area cosmetics have relatively short usable periods because applicators are repeatedly exposed during use.
FDA consumer guidance says some experts recommend replacing mascara around three months after purchase, while manufacturers commonly recommend roughly two to four months.
If mascara becomes dried out, discard it.
Do not add water or saliva to make it liquid again. The FDA specifically warns that doing so can introduce microorganisms and interfere with the product’s preservation system.
A mascara that suddenly becomes unusually thick, smells different, or performs very differently from when it was new may simply need replacing.
Fresh formula is usually easier to apply smoothly.
11. Keep Your Mascara Routine Hygienic
Mascara is used extremely close to your eyes, so hygiene matters.
Wash your hands before applying eye cosmetics and keep applicators clean. The FDA also advises against sharing mascara or other eye makeup because another person’s microorganisms can contaminate the product.
If you develop an eye infection, stop using eye cosmetics and discard products you were using around the time the infection developed.
Never apply mascara in a moving car or bus.
The FDA warns that sudden movement while holding a mascara wand near the eye can cause an injury such as a corneal scratch.
Finally, remove mascara gently at the end of the day rather than aggressively rubbing your lashes.
Clean application starts with clean lashes-and that begins with properly removing yesterday’s makeup.
Learning how to apply mascara without any clumps or smudges is mostly about controlling how much product reaches your lashes.
Begin with clean, dry lashes, remove obvious excess formula from the wand, and apply mascara from the roots toward the tips using gentle wiggling and sweeping movements.
Build volume with thin layers rather than one heavy coat, and use a clean spoolie if several lashes begin sticking together.
Apply less product to the lower lashes, allow accidental smudges to dry before cleaning them, and consider a longer-wearing formula if transfer is a recurring problem.
Most importantly, do not keep struggling with an old, dried-out tube.
During your next makeup routine, try using less mascara than usual and concentrate on separating each section of lashes. Small changes in application can create dramatically cleaner, more defined results.