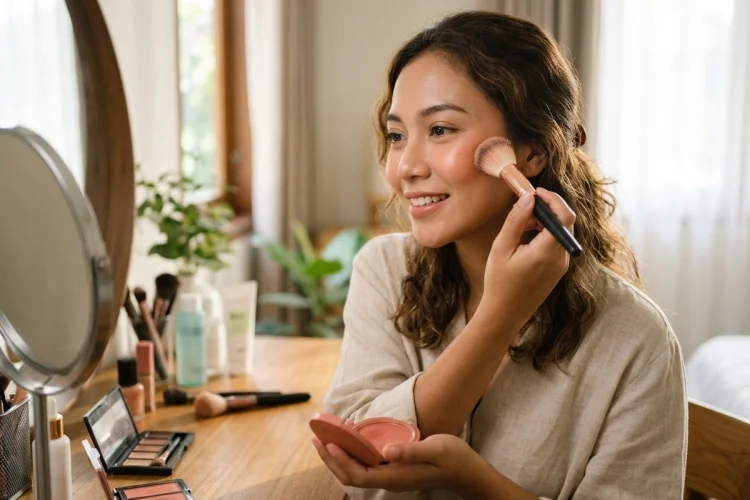
Blush is one of those makeup products that can completely change your face with just a few taps of color.
After foundation and concealer create an even base, blush brings back warmth and dimension, helping your complexion look fresher and more alive.
The tricky part is placement. Put blush too low on your cheeks and your makeup may appear heavier. Apply too much near the center of your face and the result can look more intense than you intended.
On the other hand, strategically placing color higher on the cheekbones can create a subtle lifted effect. Learning how to apply blush for a fresh and lifted appearance does not require professional makeup skills.
The key is choosing a flattering shade, understanding where to place it, starting with a small amount, and blending in the right direction.
Whether you prefer powder, cream, or liquid blush, the same basic principles can help you achieve a natural-looking flush that complements the rest of your makeup instead of overpowering it.
1. Understand What Blush Adds to Your Makeup
Blush is primarily used to restore color to the complexion.
Foundation can reduce natural variations in skin tone, including the subtle redness that normally appears around the cheeks. Adding blush afterward can make the complexion look more dimensional and lively.
Placement also changes the visual effect.
Blush applied mainly to the apples of the cheeks tends to create a softer, rounder, youthful appearance. Placing it higher along the cheekbones and blending toward the temples can make the face appear more lifted and sculpted.
NYX notes that blush placement can visually change the impression of facial structure, including making the face appear longer, shorter, softer, or more defined.
This means there is no single “correct” place for blush.
The best placement depends partly on the look you want to achieve.
2. Choose a Blush Shade That Complements Your Skin
The easiest blush to wear is usually one that works naturally with your complexion.
Soft pink and peach shades are popular because they can resemble the natural flush of the skin. Rose, coral, berry, mauve, terracotta, and deeper red tones provide additional options across different skin tones.
Instead of relying entirely on rules, think about how the color actually looks once blended.
A shade that looks extremely bright inside the compact may become surprisingly subtle when applied lightly.
Clinique, for example, describes its powder blush as buildable from sheer to more intense color, illustrating why judging blush only by its appearance in the pan can be misleading.
If you are a beginner, start with a buildable formula rather than something extremely pigmented.
You will have more time to blend and correct mistakes.
3. Know the Difference Between Powder, Cream, and Liquid Blush
Blush formula can affect both application and finish.
Powder Blush
Powder blush is one of the easiest options for beginners.
Use a soft fluffy or angled brush, pick up a small amount, and tap off excess product before touching your face. Powder is especially convenient when your foundation has already been lightly set.
It is also easy to build gradually.
Clinique recommends sweeping powder blush over the cheeks and then blending upward toward the cheekbones and temples, adding more only if additional brightness is wanted.
Cream Blush
Cream blush usually creates a softer, skin-like effect.
You can blend it using your fingers, a dense brush, or a damp makeup sponge. The warmth from your fingers can help creamy products melt into the complexion.
Maybelline recommends tapping cream blush into the skin and blending it back toward the hairline to create a sculpted, lifted appearance.
Liquid Blush
Liquid blush can look beautifully natural but may be highly pigmented.
Start with one tiny dot rather than several large ones. Blend immediately and add more only after seeing the first layer.
For beginners, controlling the amount of liquid blush is often more important than mastering complicated techniques.
4. Place Blush Higher for a Lifted Appearance
If your goal is a lifted makeup look, placement makes a noticeable difference.
Rather than concentrating all the color directly on the roundest part of your cheeks, begin slightly higher along the cheekbone.
Blend the blush diagonally upward toward your temples and hairline.
L’Oréal Paris recommends placing blush higher, roughly where highlighter is often applied, and blending toward the hairline when the goal is a more lifted effect.
Maybelline similarly suggests concentrating blush higher on the cheekbones instead of heavily on the apples when you want to visually lengthen and lift a rounder face.
The important thing is maintaining soft edges.
You should not be able to see a sharp diagonal stripe running across your cheek.
5. Blend Upward Toward Your Temples
Blending direction is just as important as initial placement.
After applying blush, use gentle tapping or circular movements to move the color slightly upward and outward.
Try to avoid blending heavily downward toward your mouth.
NYX recommends blending blush toward the temples for a natural flushed effect rather than pulling pigment too far down the face.
The technique is particularly useful for lifted makeup because it draws the eye upward.
If you are using powder, hold your brush lightly rather than pressing firmly against the skin.
For creams and liquids, tapping usually works better than dragging. Dragging a brush or sponge aggressively across the cheek may disturb foundation underneath.
Take your time.
Several light blending movements generally create a smoother result than one aggressive sweep.
6. Start With Less Blush and Build Slowly
Blush can go from invisible to extremely intense faster than almost any other complexion product.
Starting with less product gives you control.
With powder blush, gently touch your brush to the product and tap away excess before application.
With cream or liquid formulas, begin with a tiny amount.
Clinique specifically recommends building blush gradually rather than immediately applying maximum intensity.
After applying your first layer, step back from the mirror.
Sometimes blush looks subtle when you are extremely close to your reflection but much stronger at normal conversational distance.
If you want more color, add a second thin layer.
This technique is much easier than trying to remove excessive blush without disturbing foundation, concealer, bronzer, and powder underneath.
7. Adjust Blush Placement to Your Face Shape
Face shape guidelines can be helpful, although they should be treated as suggestions rather than strict beauty rules.
For round faces, placing blush slightly higher on the cheekbones and blending toward the temples can emphasize vertical length.
For oval faces, color can sit around the upper cheeks and blend outward.
People with longer faces may prefer slightly more horizontal placement because it can create the visual impression of additional width.
For square or angular faces, softer blush placement around the apples of the cheeks can help balance stronger facial angles.
Both NYX and L’Oréal Paris provide variations of these placement techniques for different face shapes.
Experiment rather than assuming one method is permanently right for you.
Take photos of several placements in natural light and compare which effect you prefer.
8. Make Blush Work With Bronzer and Highlighter
Bronzer, blush, and highlighter perform different jobs, but they should visually blend together.
Bronzer generally adds warmth, blush creates a flush of color, and highlighter adds brightness or reflection.
If you already applied bronzer around the cheekbones, place blush slightly above it and allow the edges to overlap gently.
You do not want three obvious stripes stacked across your cheek.
For a lifted effect, keep blush moving toward the temple rather than downward. Highlighter can then be placed sparingly along the highest point of the cheekbone.
You can also skip highlighter completely.
Cream or liquid blush with a naturally dewy finish may already provide enough luminosity for an everyday makeup look.
9. Try Different Placement Styles for Different Effects
Once you understand traditional blush application, you can experiment.
One popular technique is blush draping, where color extends from the cheeks toward the temples. L’Oréal Paris describes this technique as a way to create a more sculpted, lifted appearance by framing the face with color.
Another option is the sun-kissed technique.
Rather than keeping blush exclusively on the outer cheeks, lightly carry some color across the bridge of the nose. This creates the appearance of having naturally flushed after spending time outdoors.
L’Oréal Paris describes a “W” placement across the cheeks and nose for this type of sun-kissed effect.
For everyday makeup, however, you do not need to follow trends.
A simple sweep of color across the cheeks, blended toward the temples, can be more than enough.
10. Fix Blush That Looks Too Strong
Applying too much blush is a common beginner mistake, and fortunately it is usually easy to fix.
Do not immediately wipe your cheeks.
Instead, take the brush or sponge you used for foundation and gently tap it over the blush. The small amount of foundation remaining on the tool can soften the intensity without completely covering the color.
You can also use a clean fluffy brush to blend the edges.
For powder blush, a very light amount of face powder can help tone down excessive pigment.
Then check everything in natural daylight.
Blush should look like part of your complexion rather than a clearly defined patch sitting on top of it.
If your first attempt looks too intense, simply use less product next time. Learning how strongly pigmented each blush is becomes much easier after a few applications.
Learning how to apply blush for a fresh and lifted appearance is mostly about smart placement, gradual application, and careful blending. Choose a shade that complements your complexion, start with a small amount, and build the intensity slowly.
For a more lifted effect, place blush slightly higher along the cheekbones and blend upward toward your temples rather than heavily downward. Powder, cream, and liquid formulas can all create beautiful results, so choose whichever texture feels easiest for you to control.
Most importantly, treat blush placement as something you can experiment with rather than a strict makeup rule.
During your next routine, try moving your blush slightly higher than usual and use half your normal amount. Blend it toward your hairline, check the result in daylight, and see how one small change can transform your entire makeup look.